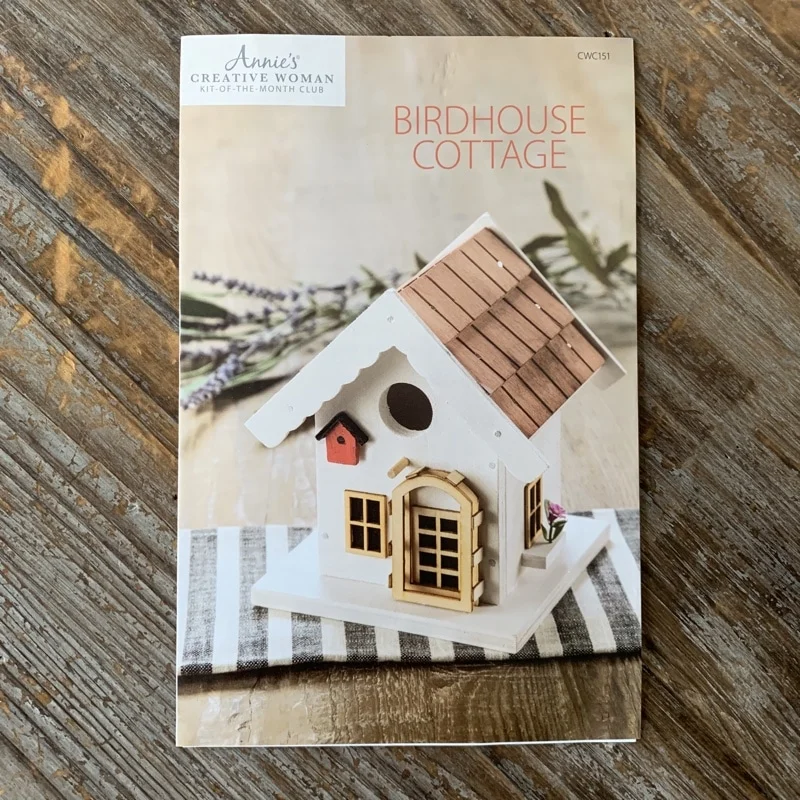
Annie’s Creative Woman Kit-of-the-Month Club “Birdhouse Cottage” Review + 50% Off Coupon
Today, we are reviewing our second Annie's Creative Woman Kit-of-the-Month Club delivery! I am super excited about this because I loved making my first Wooden Home Sign craft project.
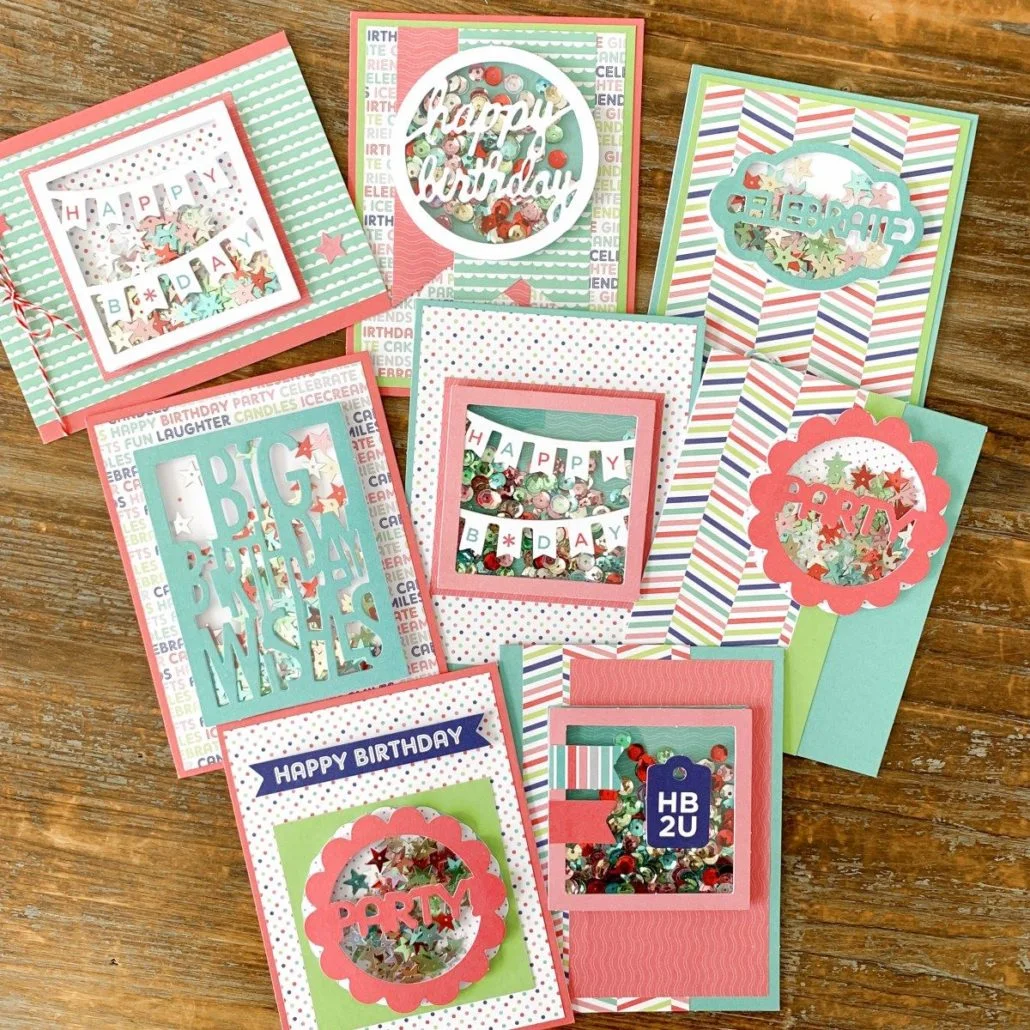
Annie's Creative Woman Kit-of-the-Month Club provides you with most of the supplies you need to make a new craft every month! You'll learn some of the most popular crafting techniques including painting, beading, needlecrafts, memory crafts, soap-making, mosaics, card-making and lots, lots more!
Cost: $19.95/month
Shipping: $5.95/month US and $6.95/month Canada
DEAL: Get 50% off your first month of Annie's using this link and coupon MONTHLY50.
As seen on 9 Best Annie's Kit Clubs Subscription Boxes.
We received this kit for review purposes. All opinions our our own.
Annie's Birdhouse Cottage Craft
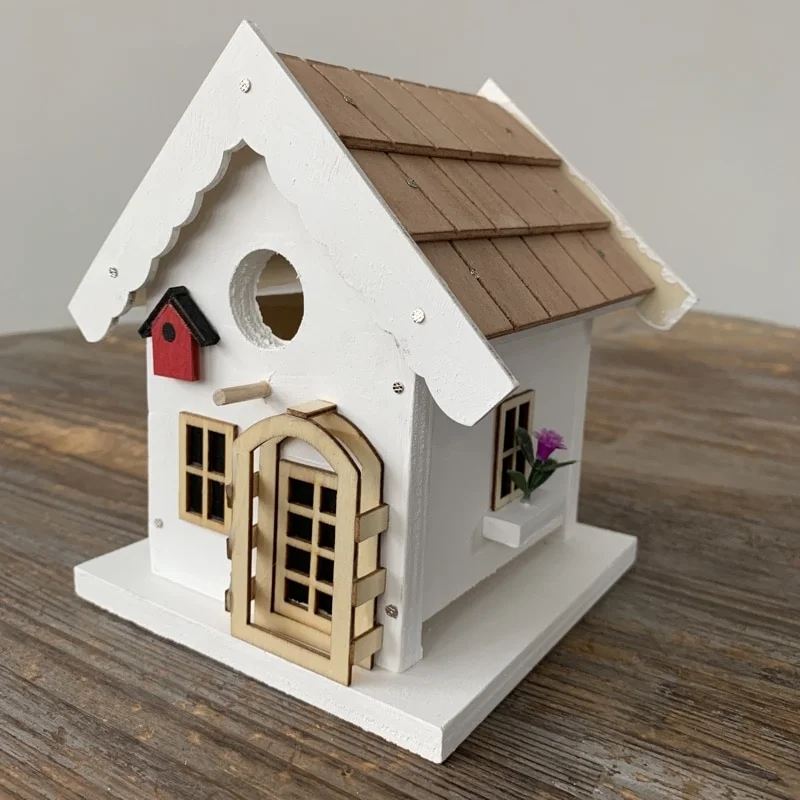
I was super excited to see a wood working project in this month's kit! The project itself involves making an adorable, white Birdhouse Cottage. This instruction booklet has detailed instructions with colored photo illustrations to make the bird house.
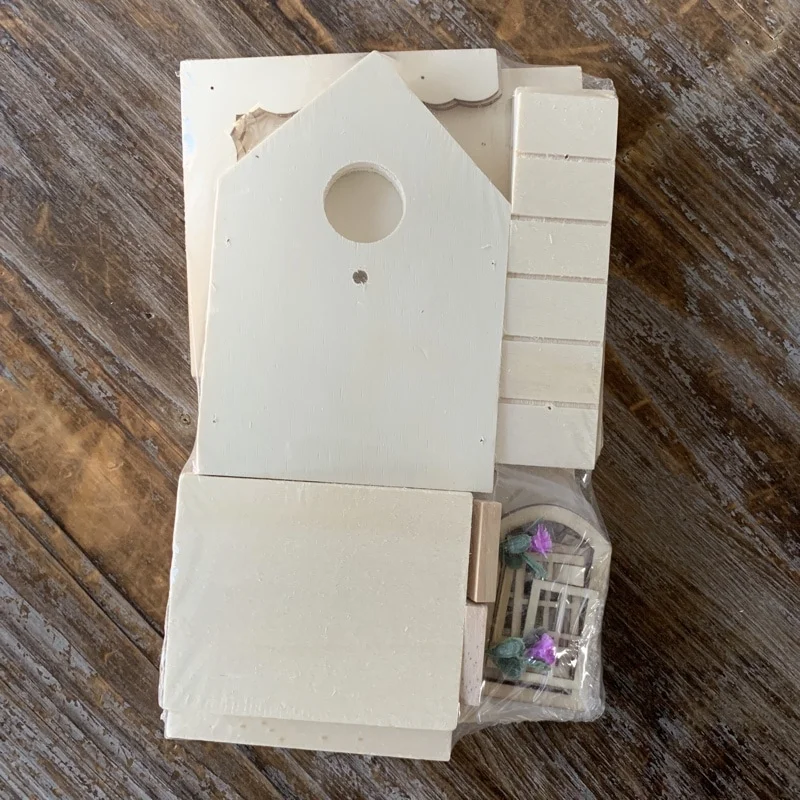
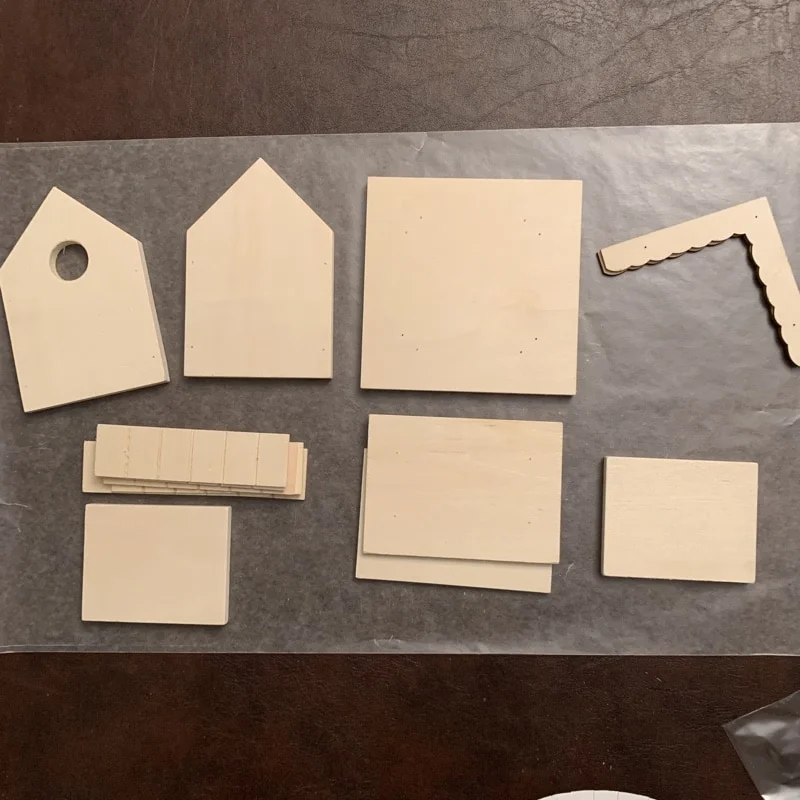
The wooden pieces, sandpaper, and nails were nicely packaged in plastic wrap. The instruction sheet says that I need to supply a hammer, paper towels, a paper plate, a cup of water, a pencil, waxed paper, a rag, and glue.
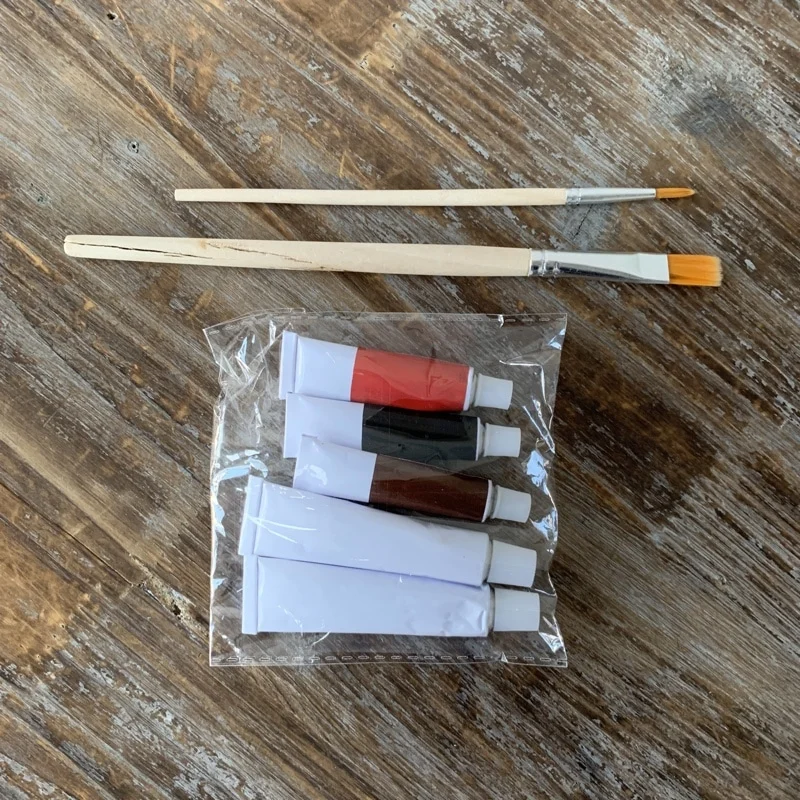
We also received a thin paint brush, a thicker paint brush, and some acrylic paint.
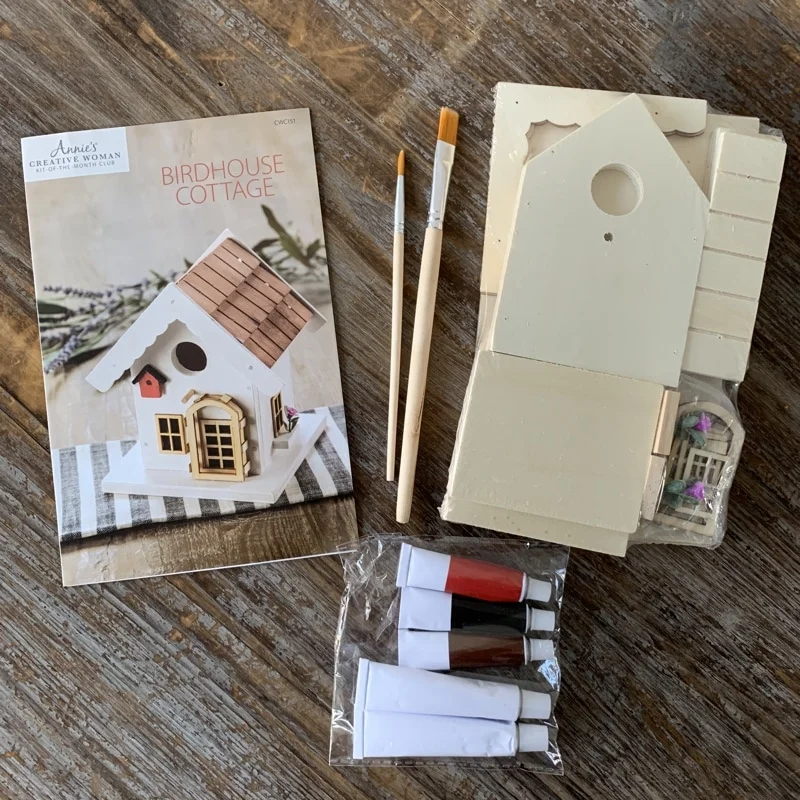
This is everything that we received in the package.
I first laid all of the wooden pieces out onto some wax paper. Annie's recommends doing this, especially if you're painting. I haven't thought of using wax paper before, but it makes sense! Once paint dries it, it will stick to whatever is underneath it. I will be sure to use this tip for my next painting project!
The first step to make this birdhouse was to sand all of the wooden pieces. The sandpaper was included in the kit, and it worked very nicely to make all of the wood feel smooth to the touch.
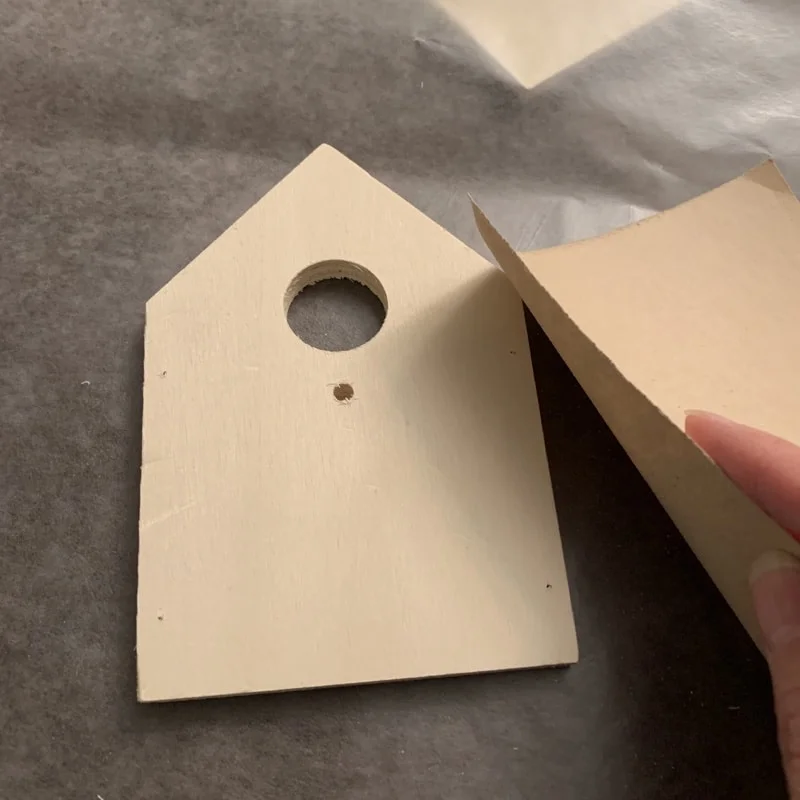
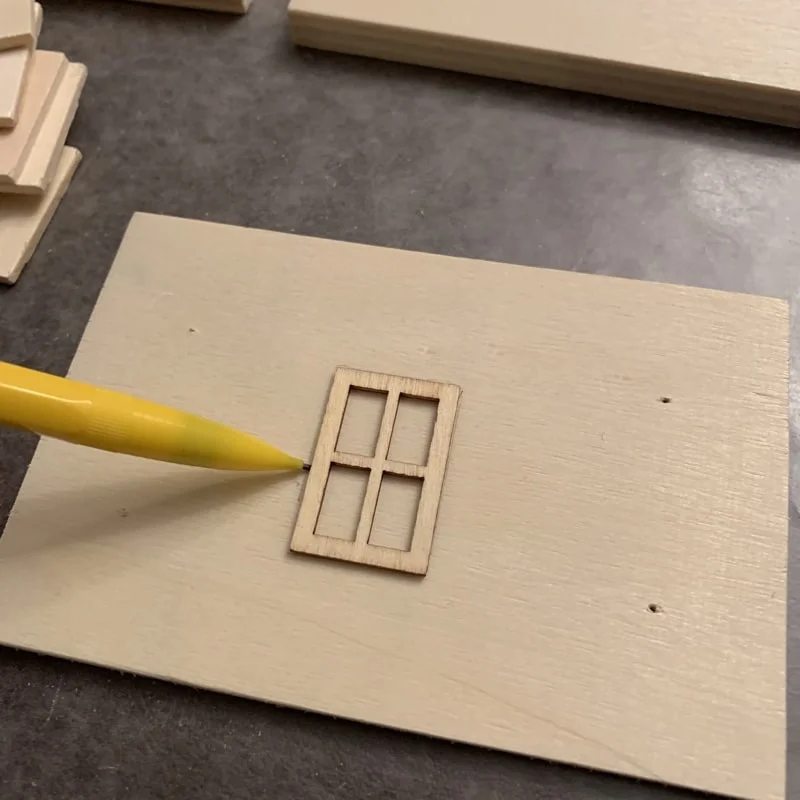
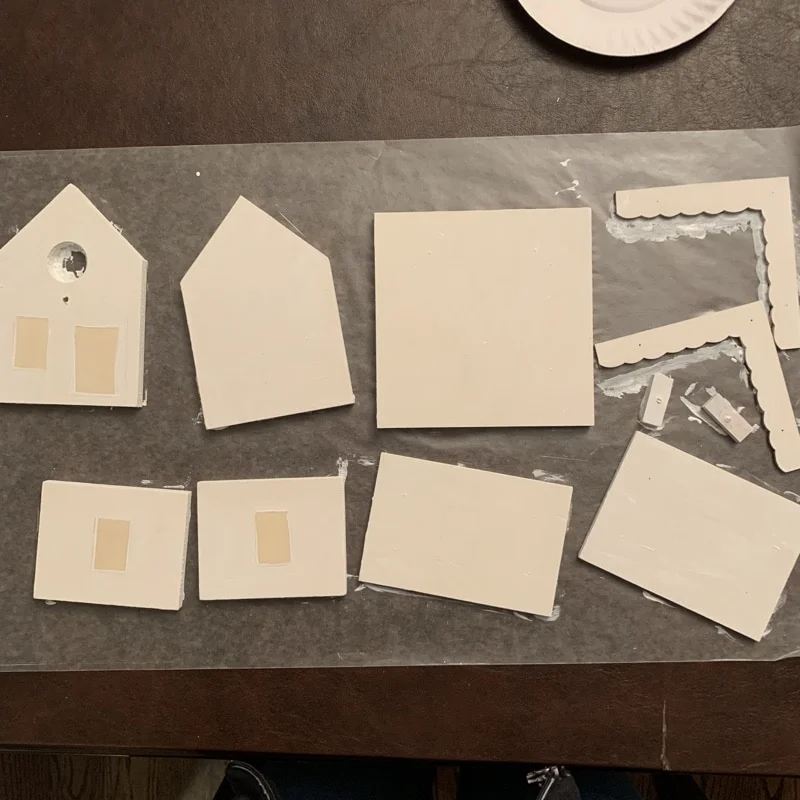
After sanding all of the pieces, I traced the outline of where the windows would go. I had to do this because the inside of the windows will be painted black.
The next step was to paint the wooden pieces with the included white acrylic paint.
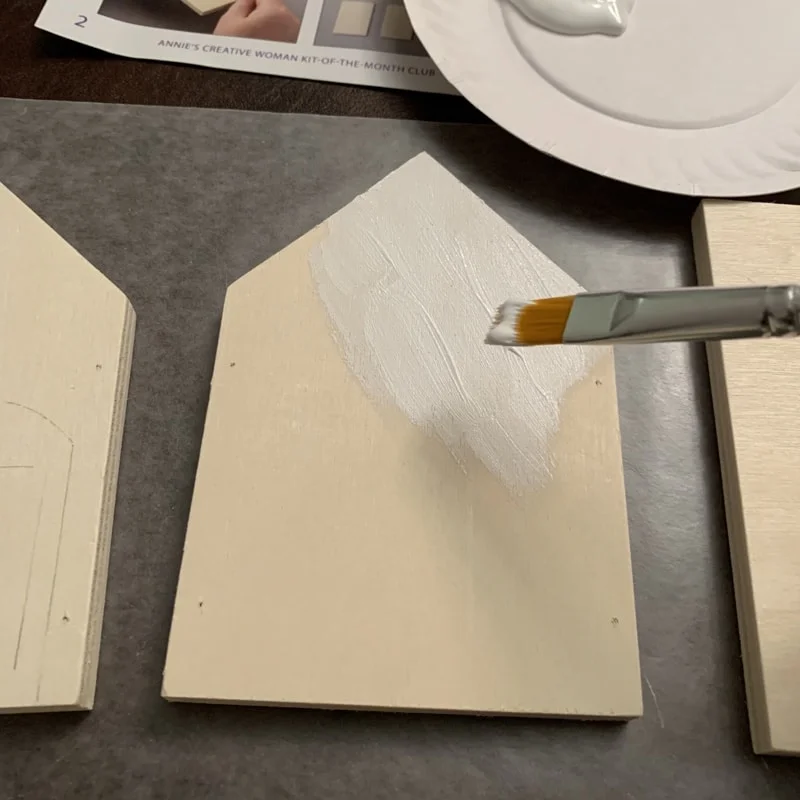
Here is a finished piece painted once.
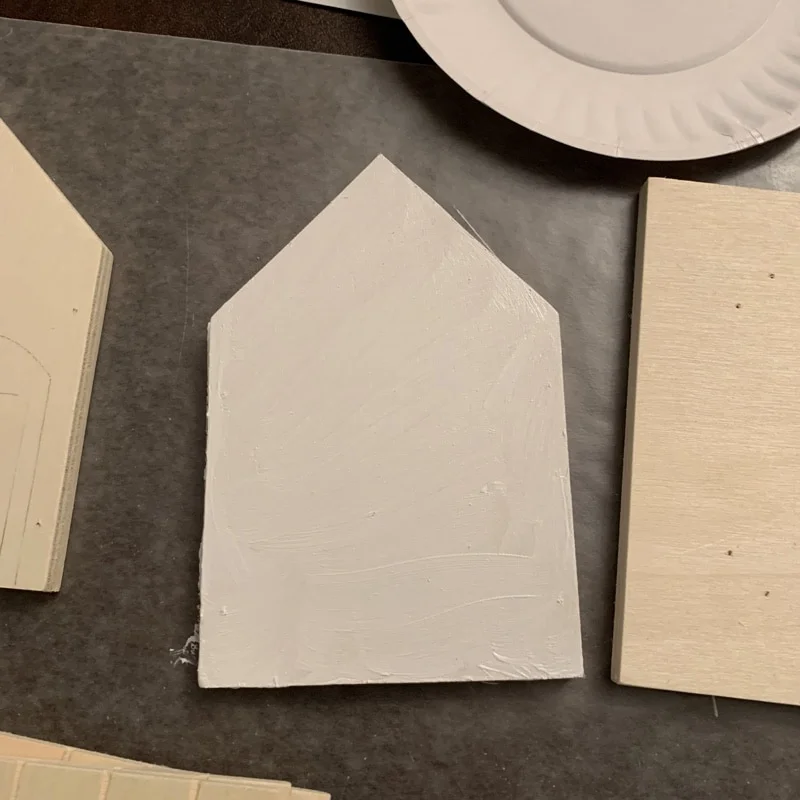
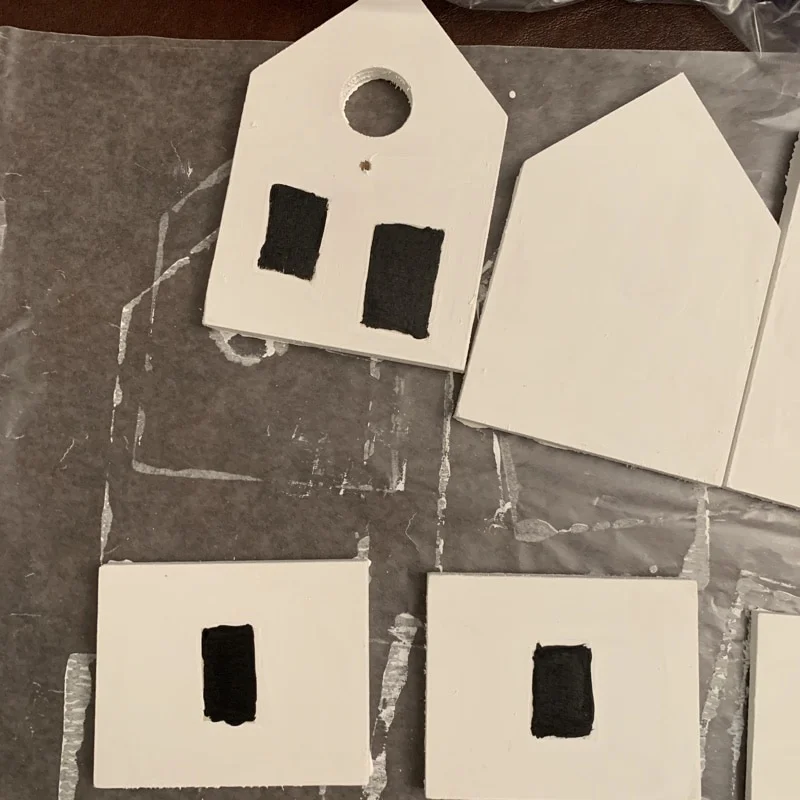
And here are all of the pieces after I painted them white, leaving some areas bare for the door and windows. I did end up painting two coats of white paint, only because I wanted my bird cottage to have a bright white color. But, you could have stopped at one coat of paint – it just depends on your preference. Luckily, I had some extra white acrylic paint to put on two coats.
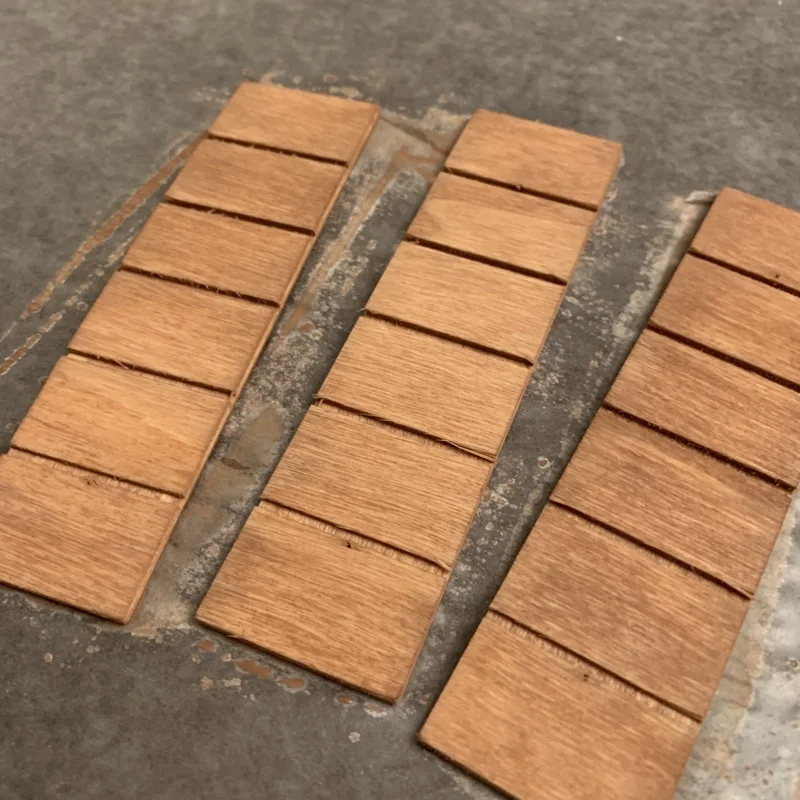
The next step required mixing the brown acrylic paint with water to create a wooden “stain” color on the roof tiles. I squirted a lot of brown paint onto my paper plate, so it required quite a bit of water to get to the stain I was looking for.
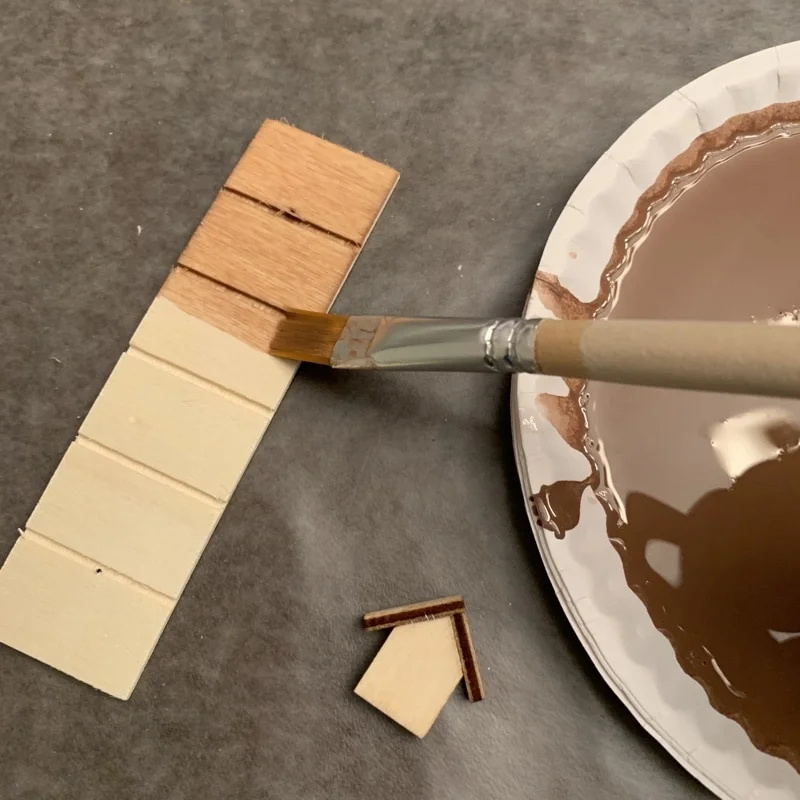
But, as you can see, the brown “stain” turned out very nicely on the roof tiles.
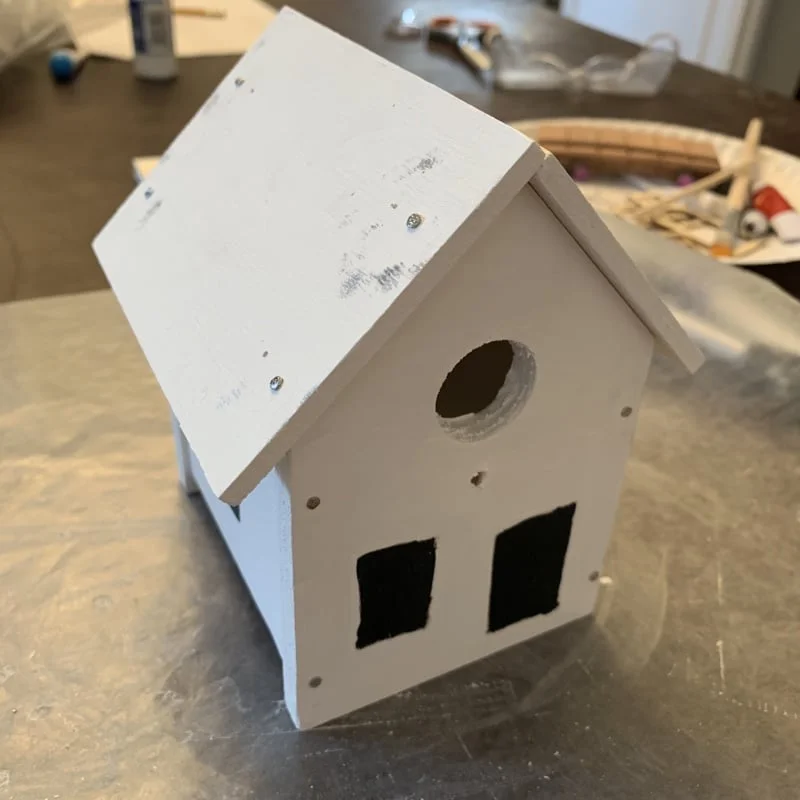
Next, I painted the openings of the windows and door black. The black color gives this bird cottage some really nice constrast!
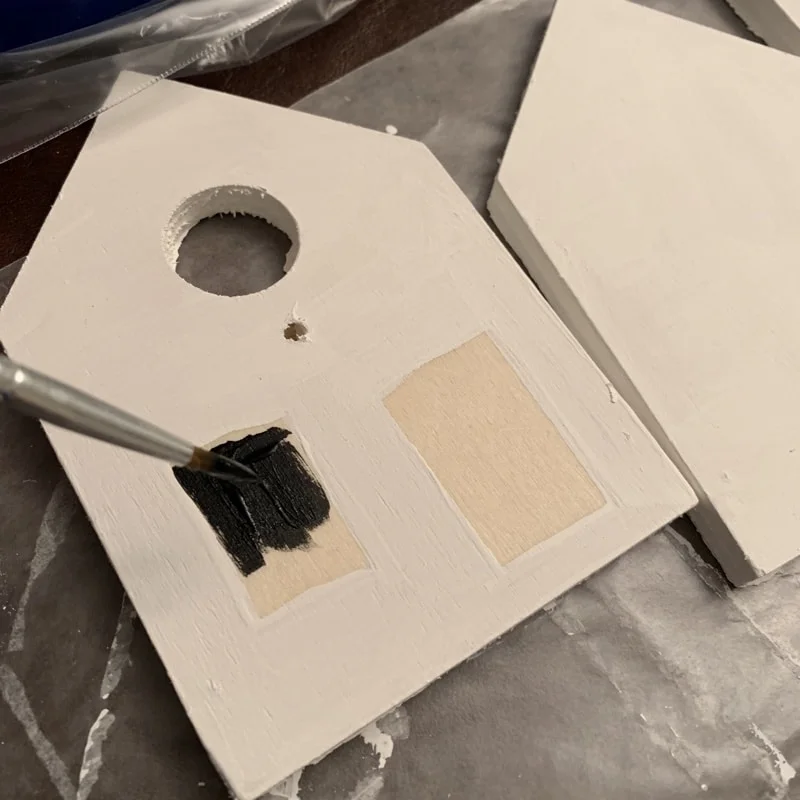
Here, you can see all of the door and window openings painted black.
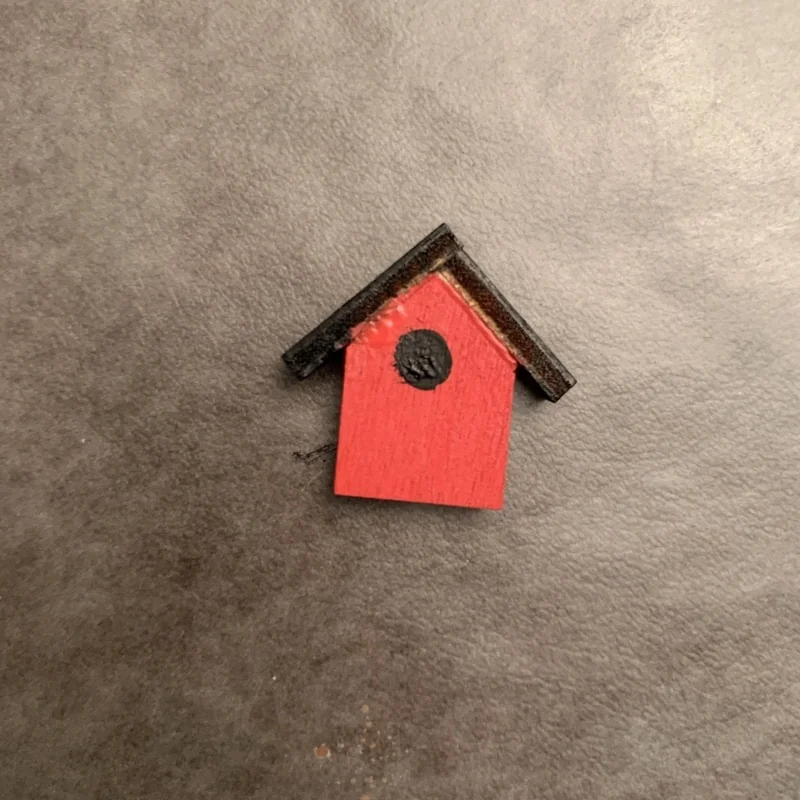
Then, I painted the tiny birdhouse red, with a black roof and black hole for the bird opening. This painting took a steady hand, and it also helped that Annie's sent a detailed brush for this kind of painting.
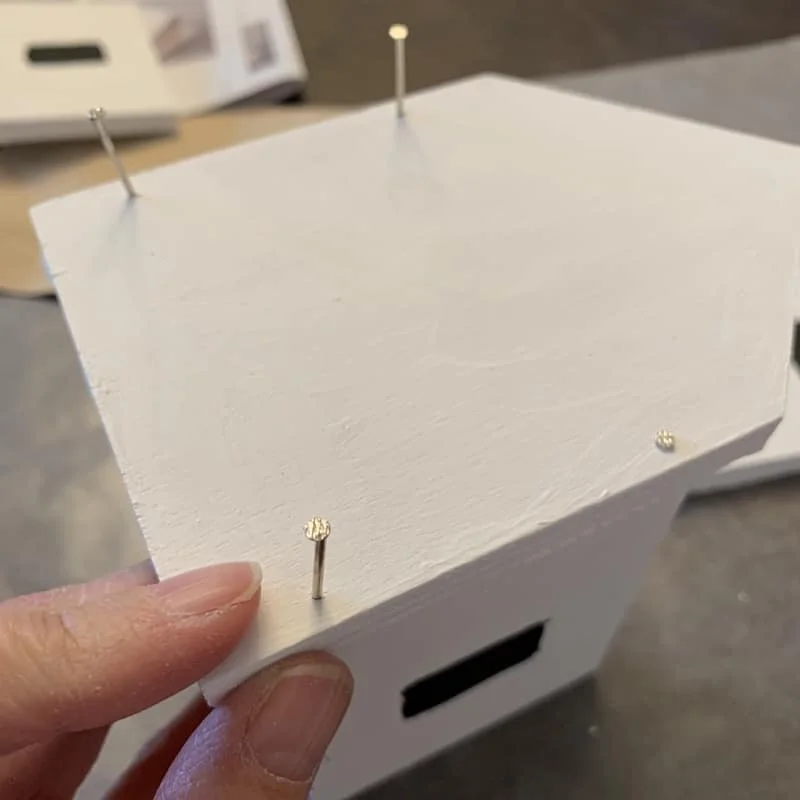
Once the paint dried on the wooden pieces, the next step was to nail the wooden pieces together to create the structure of the bird cottage. There were pre-drilled pilot holes on the wooden pieces, making it easier to pound the nails into the wood.
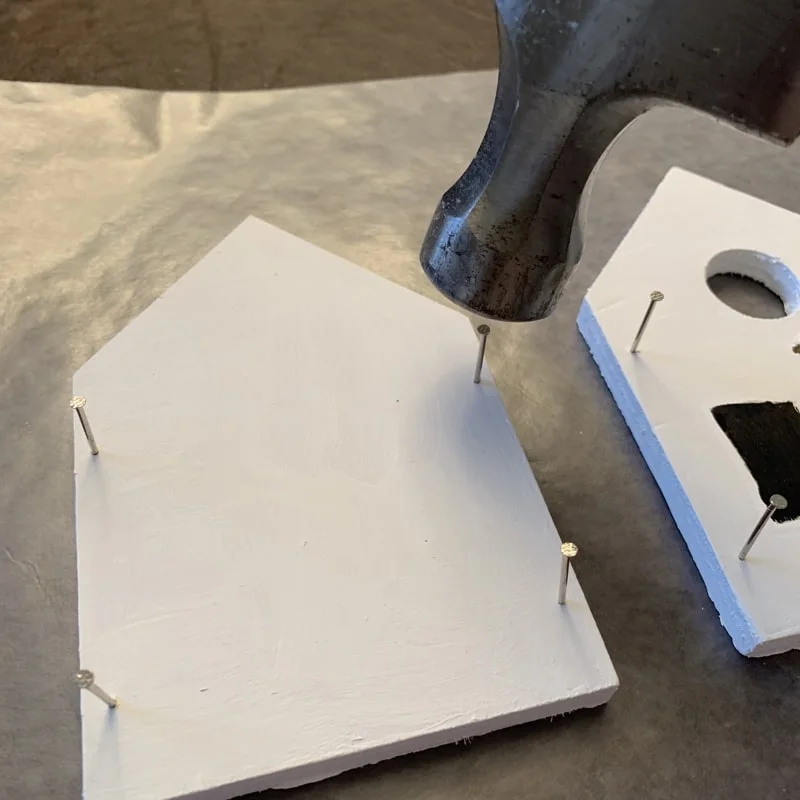
Here, you can see a closeup of our first nail.
I thought it would be difficult to nail these pieces together, but it was not!

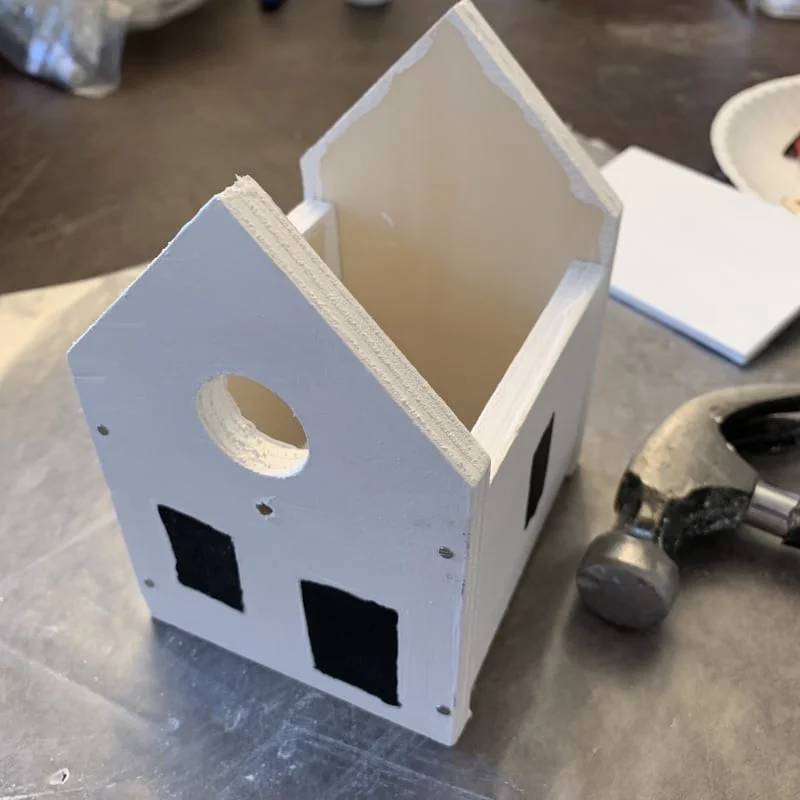
Here is the main structure of the bird cottage, all nailed together!
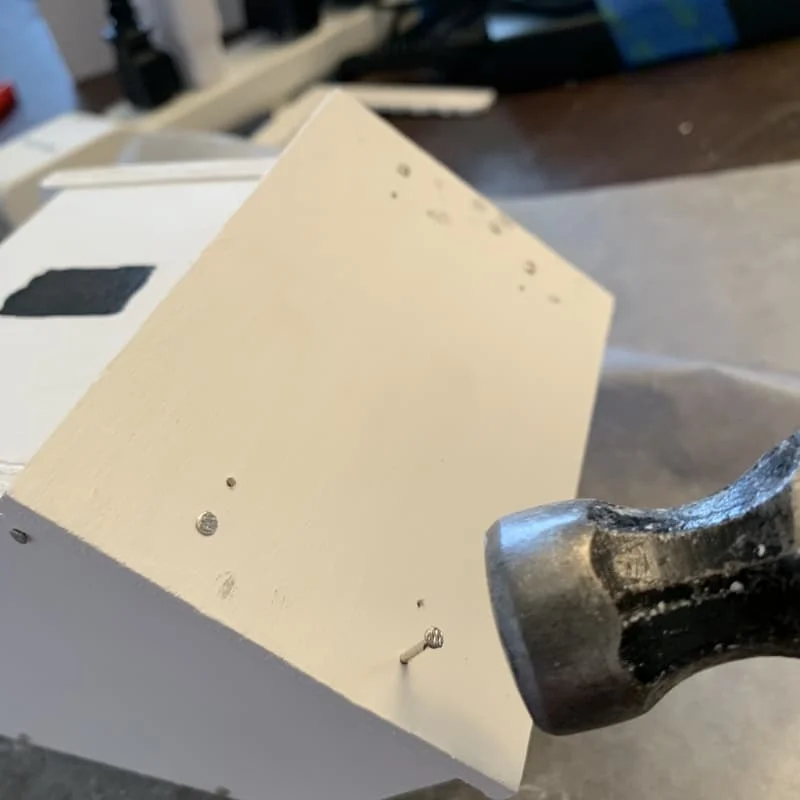
For the roof pieces, the pilot holes weren't quite aligned to the house (as I assembled it), so I just created my own pilot hole by tapping the nails into the roof pieces.
I realized that when you are hammering at an angle, it was best to lay the birdhouse on its side so I could get a better angle at hitting the nail on its head.
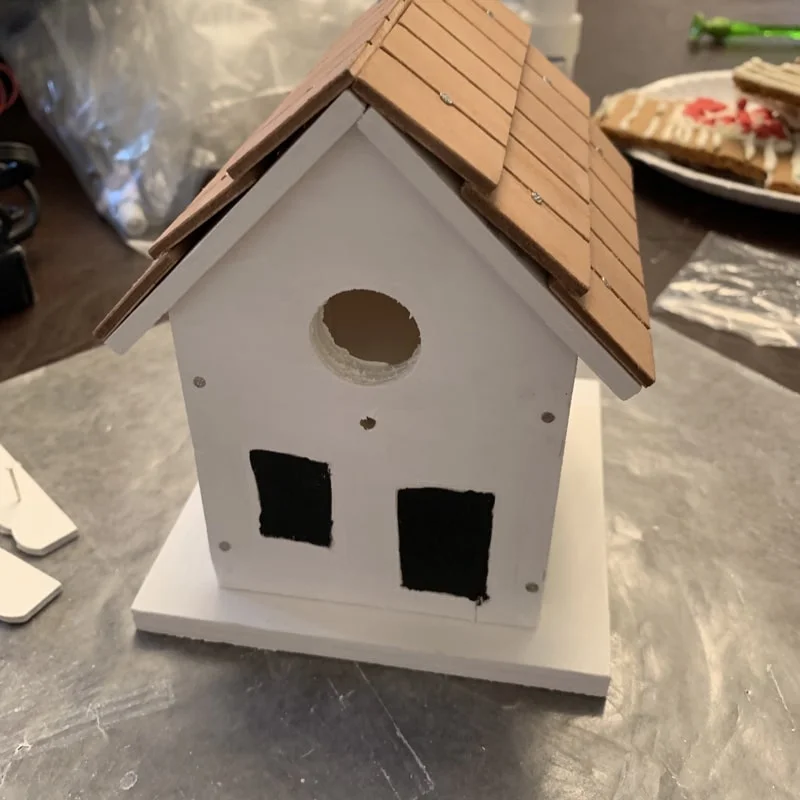
Here's a look at the roof pieces once I finished nailing them onto the house.
I then took the roof tiles and pounded them into the roof. This was super easy and quick because the roof tiles are not as thick as the roof itself.
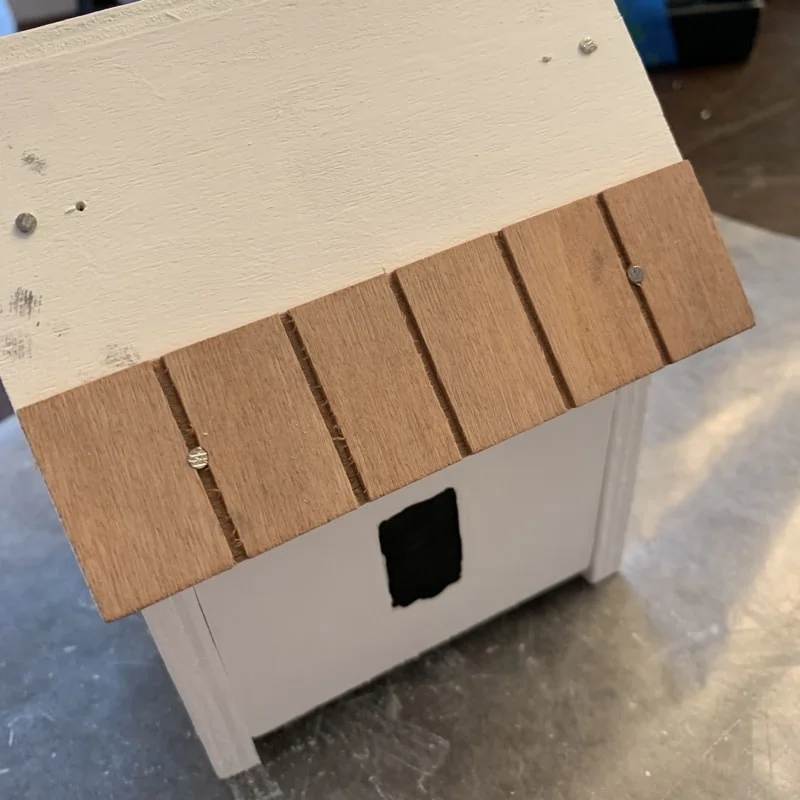
Here's a look at the roof tiles once they were all attached. This only took me about 5 minutes to do.
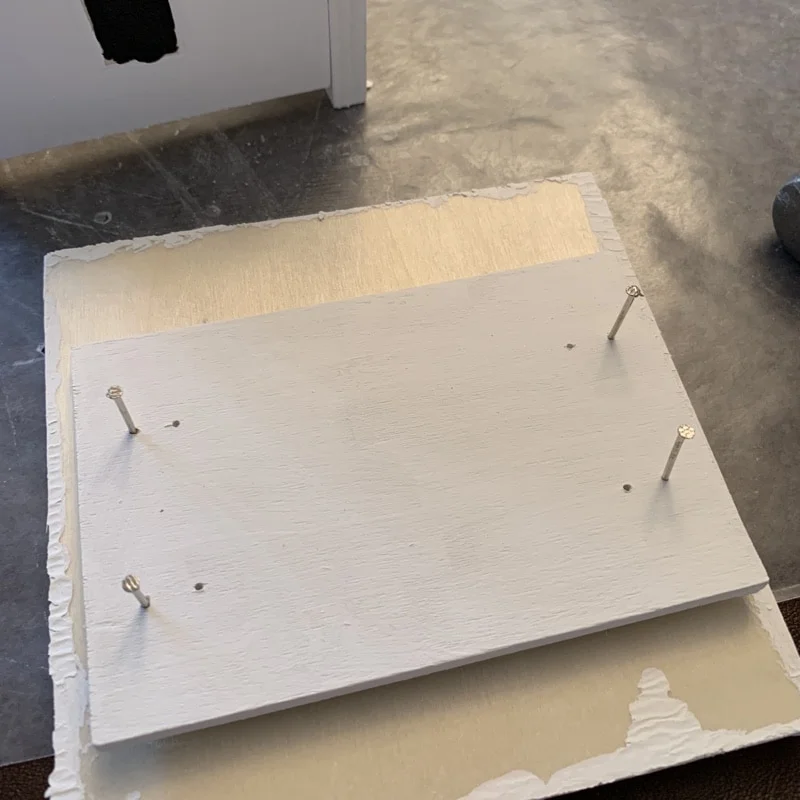
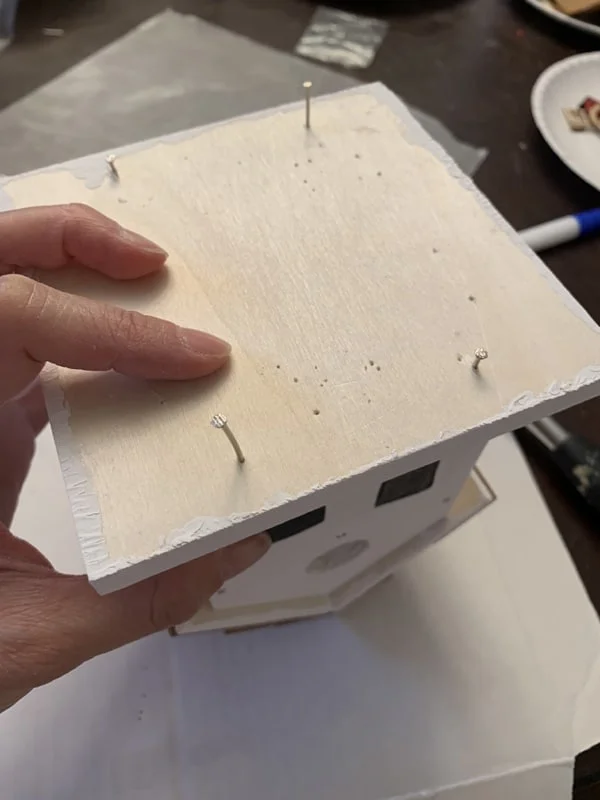
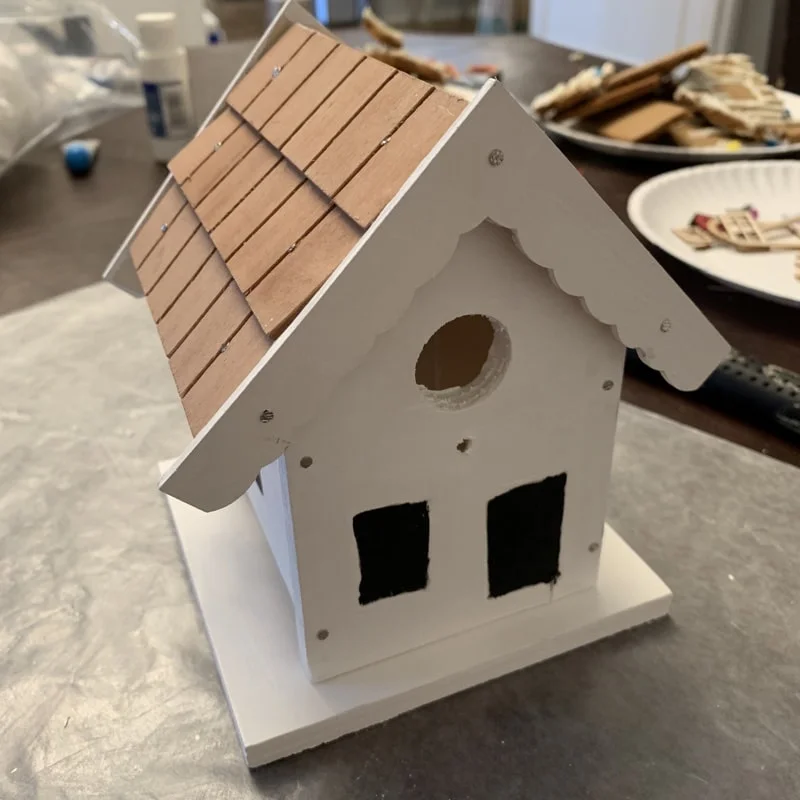
I realized at this point that I forgot a step and should have attached the base of the birdhouse many steps ago. Oh well! I just attached the base by turning the birdhouse upside down.
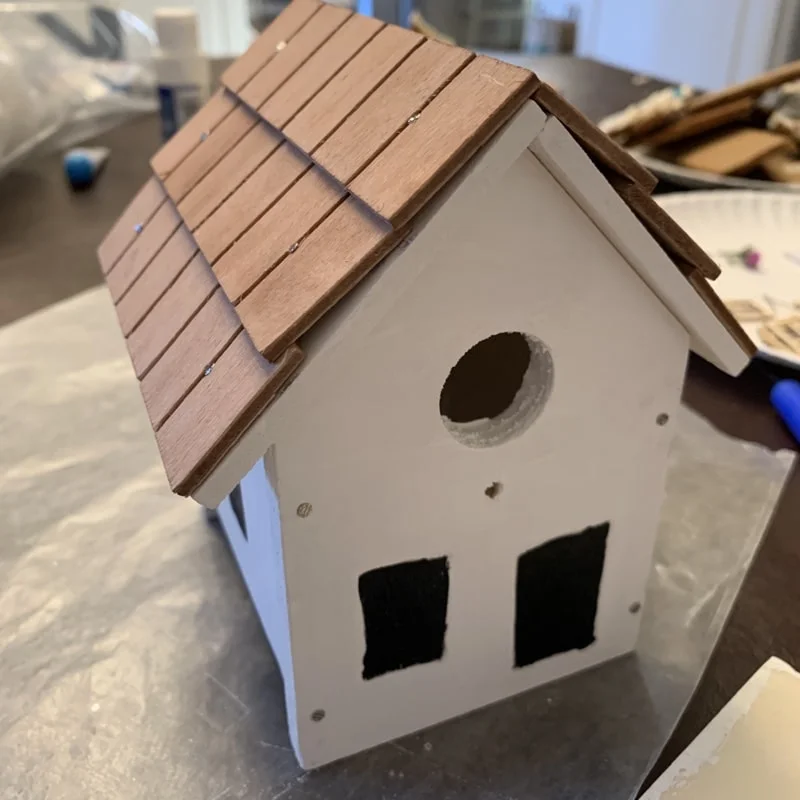
Once the base was attached, I was ready to attached the scalloped eaves.
The scalloped eaves were also really easy to nail in because they were thin as well.
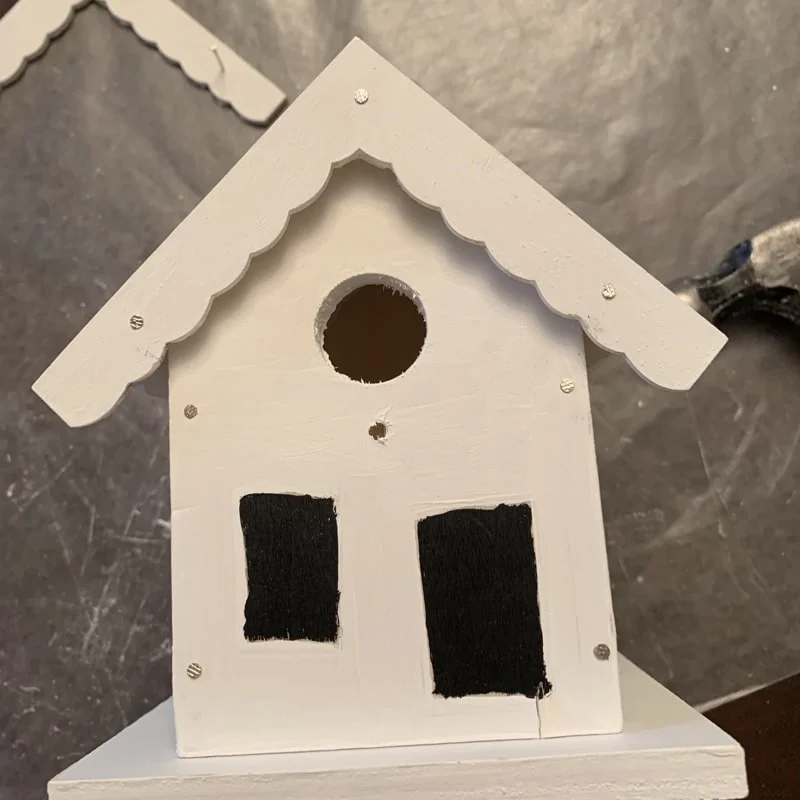
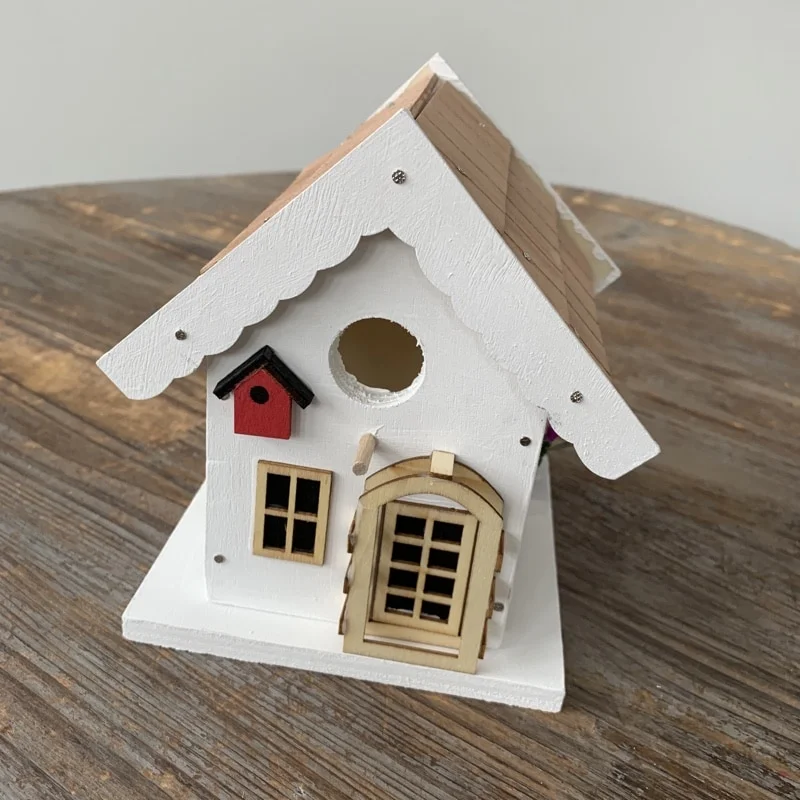
This what my bird cottage looked like after all of the nailing was done.
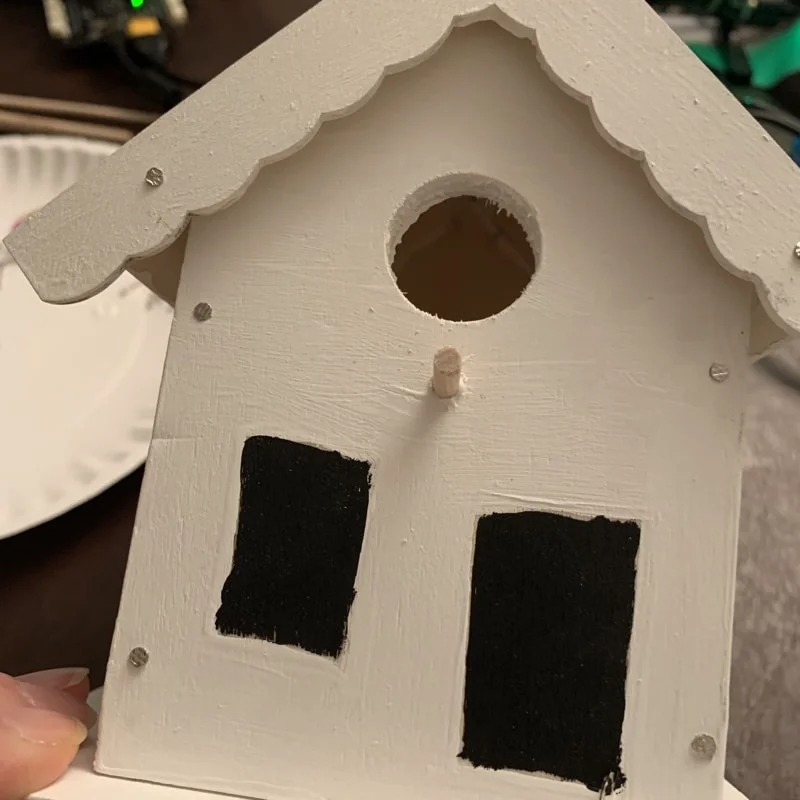
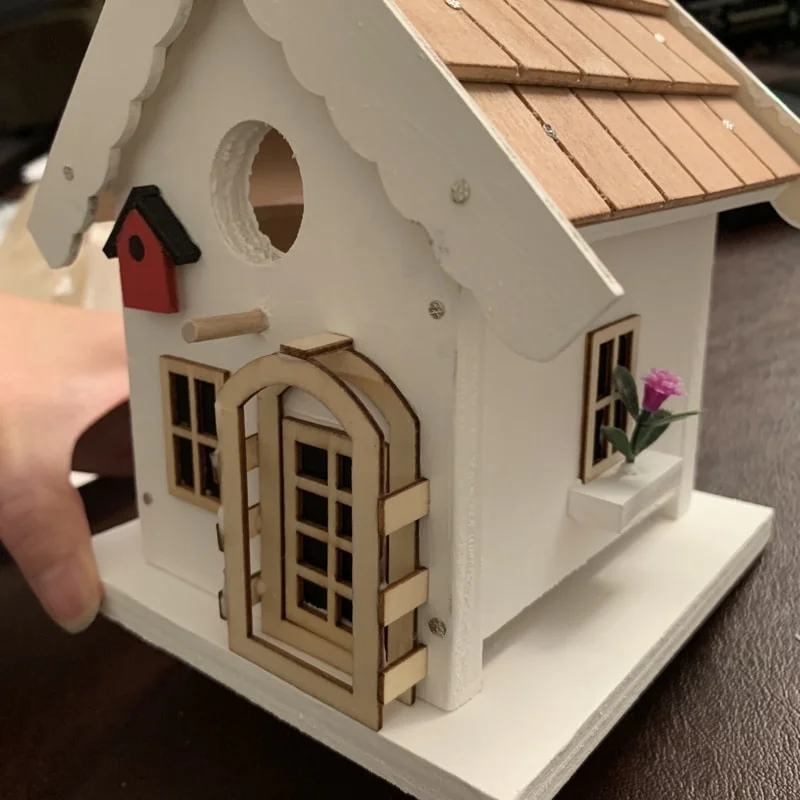
The last steps were to add the final decorative pieces with glue. I use tacky glue for most of my craft projects that require a strong adhesive. This step included gluing the dowel into the front of the bird house for the bird to sit on.
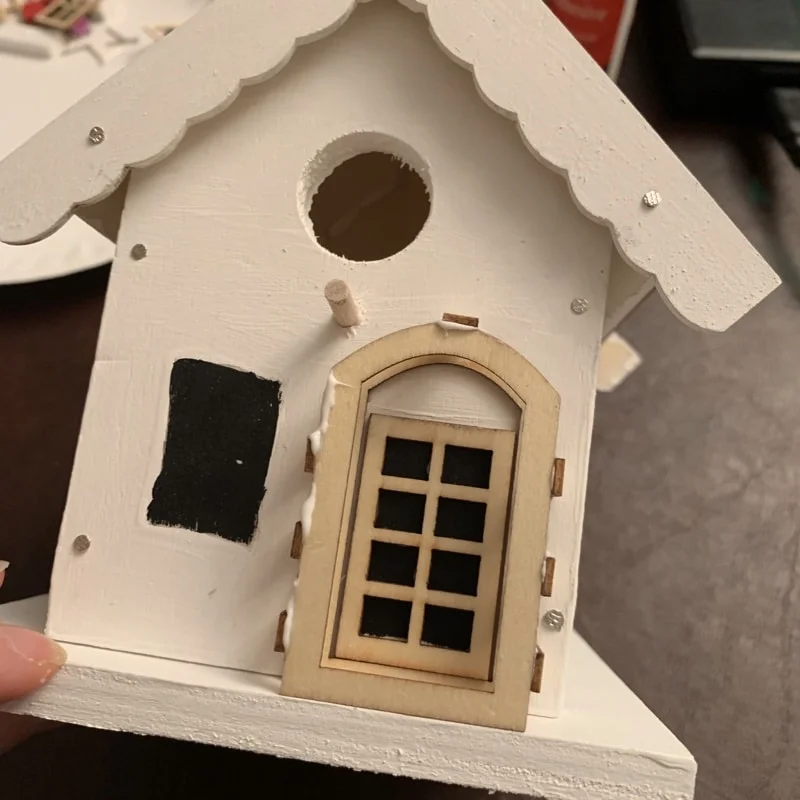
Next, I added the front door and pieces of the trellis on with the tacky glue.
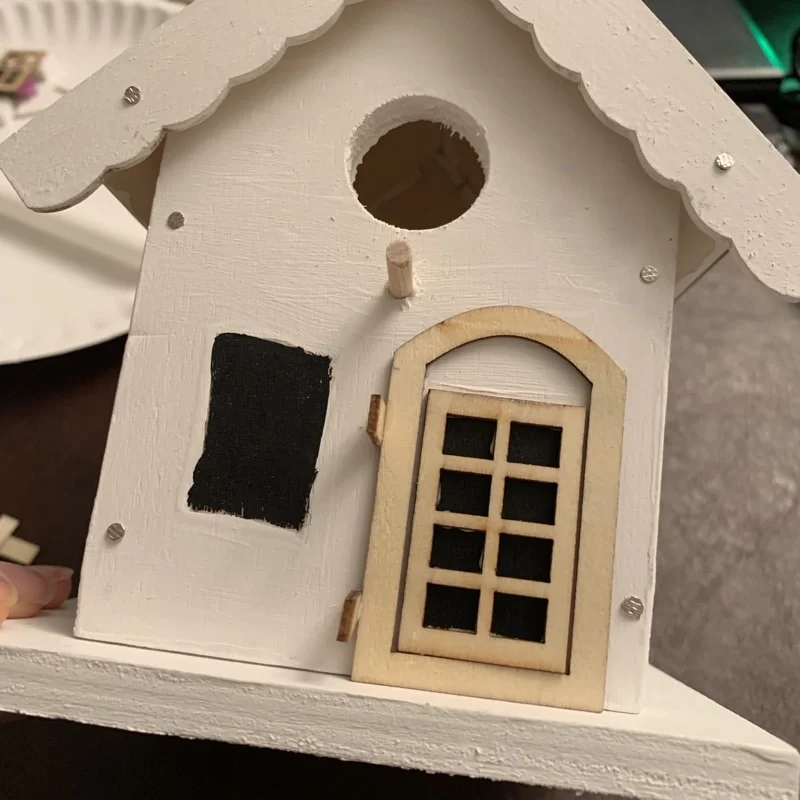
The trellis was a bit tricky to assemble because the pieces were so small, but the tacky glue really helped here.
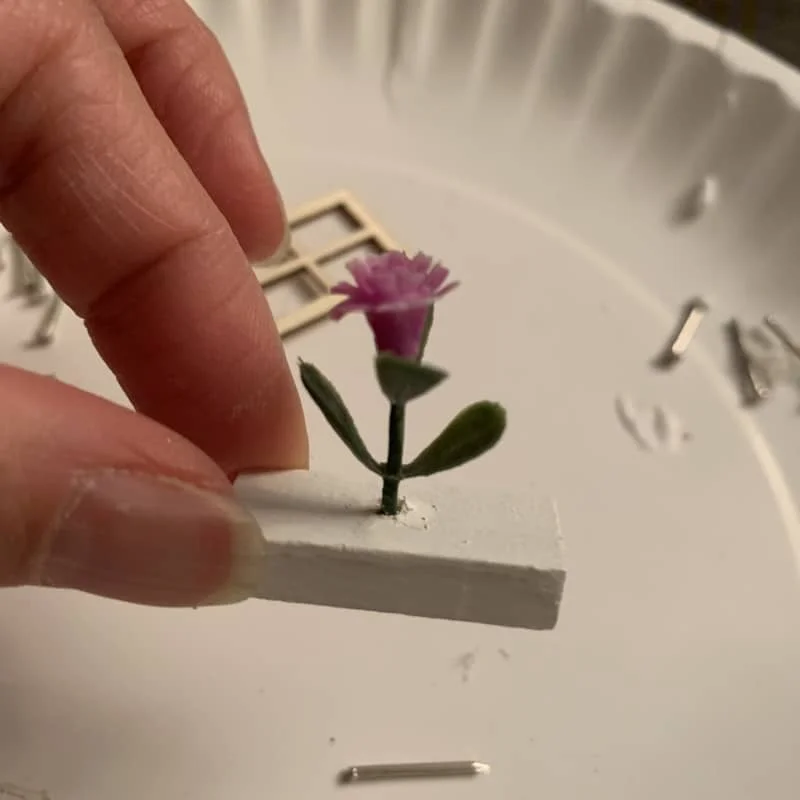
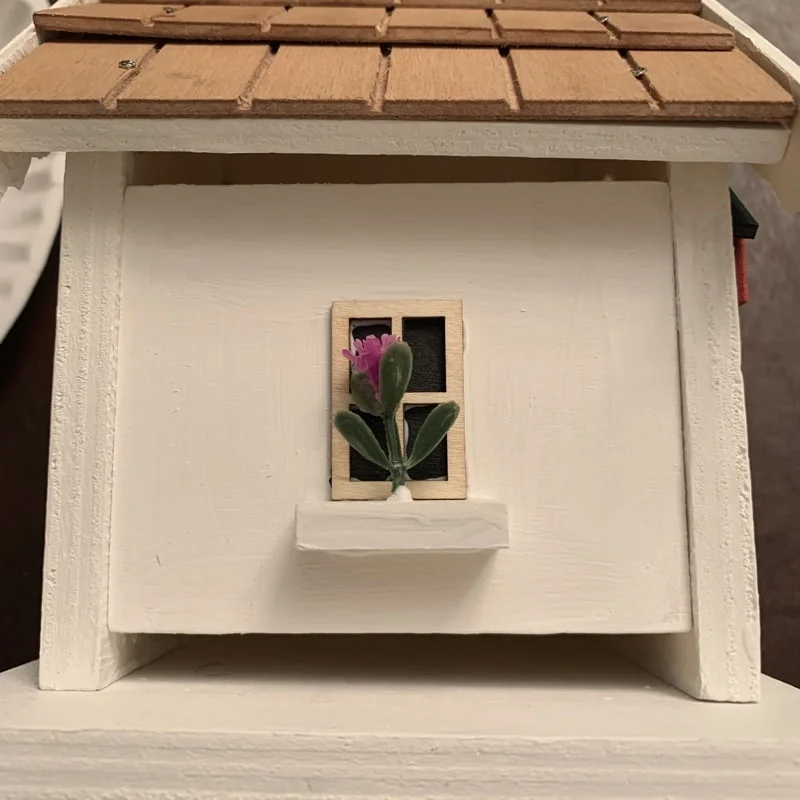
Next, I had to add the flower to the window boxes. I realized that I painted over the holes with white paint, so I used a tack to carve out room for the flower stem.

And wa la! The stem fit in perfectly into the window box.
I used a generous amount of glue to adhere the window box to the house.
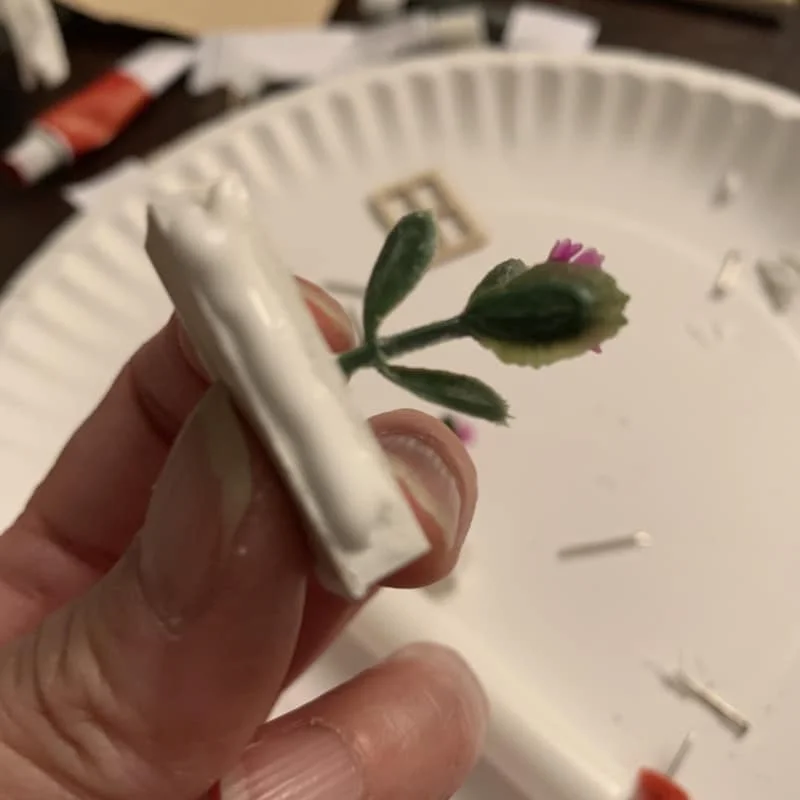
Here's what the window and window boxes looked like after I glued them on.
Once I was done gluing everything on, this is what the decorative pieces looked like. Aren't they so cute?!?
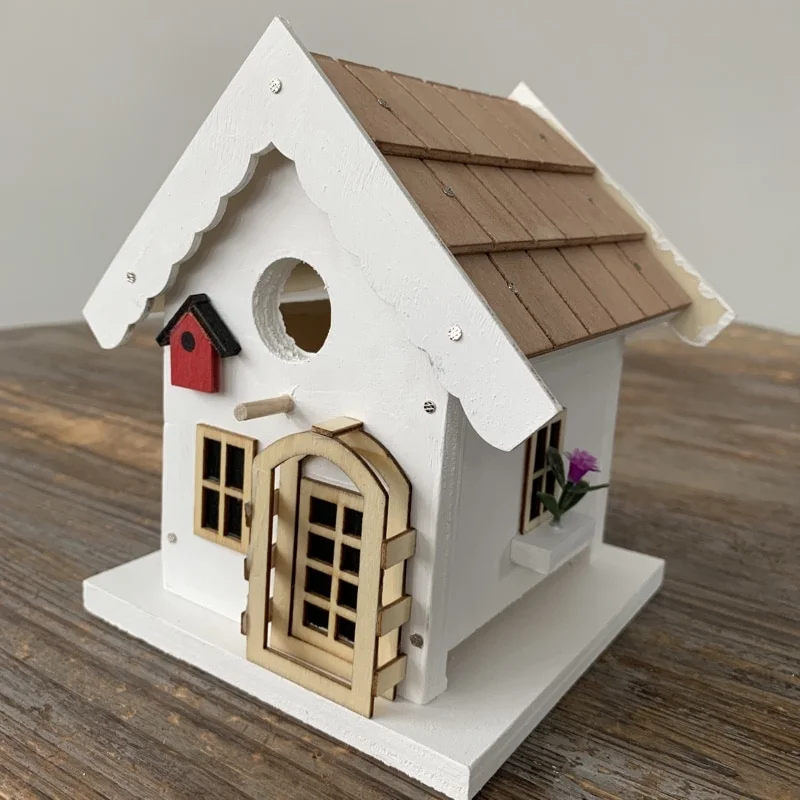
And, in better light, this is what my completed Bird Cottage looked like.
I just loved how this bird cottage came together. It was a multi-day project because I had to wait for the paint to dry, but I really enjoyed the process of making this bird house.
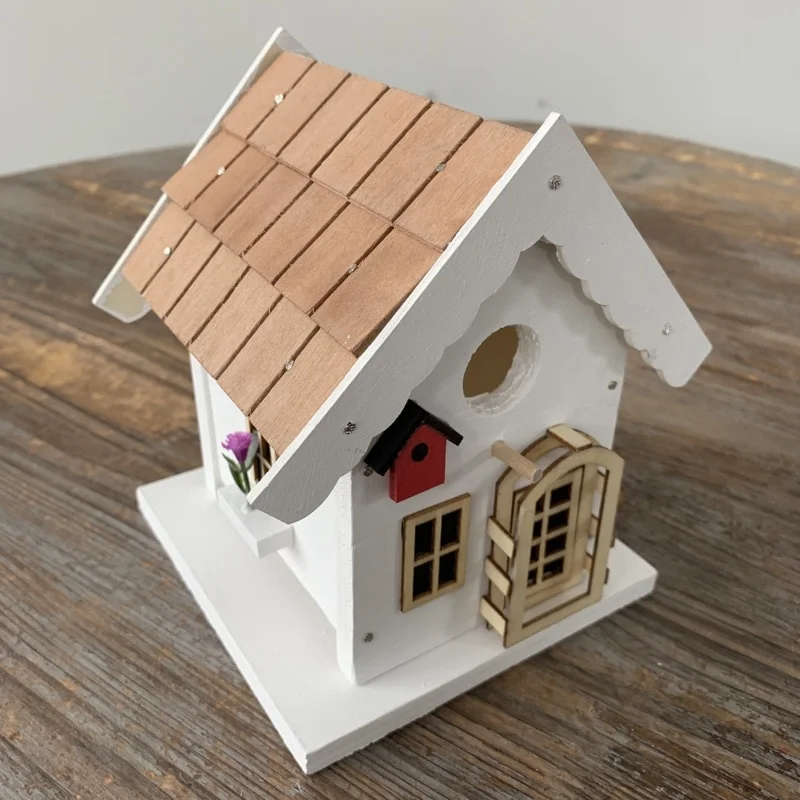
Here's a look at the other side of the house.
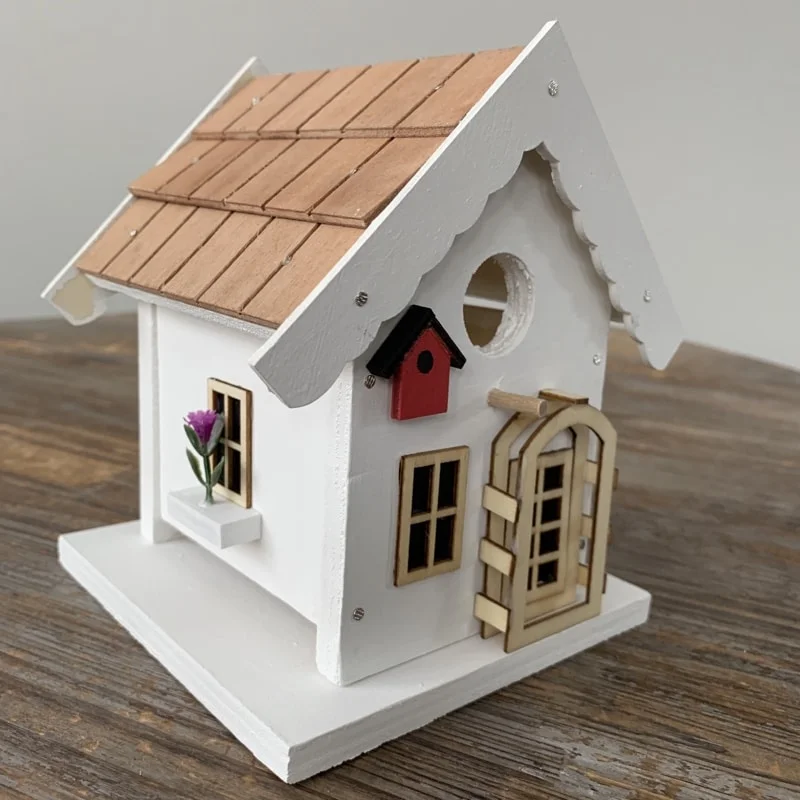
I really loved how this Bird Cottage project turned out! It was the first time that I used this many nails in one project. 🙂 I thought I might hang this Bird Cottage outside, but I think it is way to cute and precious to do that. I'm putting in on my bookcase for decoration! I really enjoyed this craft project and Annie's made it really easy to do by sending these craft materials right to my door. Aside from having to add some of my own pilot holes and adding my own white acrylic paint to this project, everything else was included and was pretty easy to do.
DEAL: Get 50% off your first month of Annie's using this link and coupon MONTHLY50.